Thursday, July 29

Table Top Coloring

Tiny hands love to color. Miss Scarlett's little hands love to color on anything that I will let her and somethings that I'm not as happy about her coloring on including books, walls, chairs, carpet and people. I decided to give her a big canvas to work on by covering our kitchen table with butcher paper and letting her go wild. I just rolled it out to the length of the table and taped it down to the underside of the table.
We threw some crayons down and created a new tablecloth for us. I figured that we would just leave it there for the night but we have enjoyed having it on the table and just keep adding to the picture each day, I think it has been there for about 4 days now.
♥The budding artist at work♥

We love Sesame Street right now so I added her favorite characters to the table then she helped color them in.
This would also make a great group project if you had a bunch of kids together and they could all work on a big picture together.

Wednesday, July 21

No mess painting

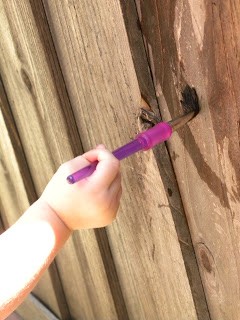
In an attempt to keep our kitchen table clean for a day we decided to take crafting outside for the day. I gave her a bucket filled with water and an old paint brush, showed her how to "paint" the fence and let her go nuts. I didn't have to worry about her ruining her outfit or getting paint on anything, it was wonderful.  
Then once she was done with the fence we moved on to the sidewalk, which makes a beautiful canvas for water art. When we were finished, all I had to do was dump the water out and dry our paintbrush, it was a snap. 

Saturday, July 10

Egg Carton Bouquet

I hate to throw away anything that could possibly be re-purposed into something new. I save all sorts of "trash" for future inspirational craft projects. I have been saving all our egg cartons and we put one to good use this week making an egg carton bouquet. All you need are a pair of scissors, some paint, pipe cleaners and an old egg carton.

Start out by cutting the bottom of your carton into 12 "flowers".


You may need to shape each flower by cutting along the outside to give it a petal like appearance.


While you are taking care of the cutting part, make sure your little one has something to keep their hands busy. How high can she stack them? Let's see!


Once they are all cut, you are ready to paint. We used acrylic craft paint that we watered down to give it more of a watercolor look.


This is the perfect time to get your little one involved. I would suggest putting them in some grubby clothes or have them put on a smock so they don't get paint on a nice outfit.


After they are all painted allow them to dry.


Once they are dry poke two holes in the bottom center of your flower. You will then thread your pipe cleaner up one hole and back down the other hole. Then twist the two sides together and you have your stem.


At this point you are done unless you want to add a little extra flair. We stuffed the center of our flowers with our homemade pom poms which have now become quite eye catching for our kitties. You could also add glitter to the petals or any other thing that excites you.

Enjoy creating!

Thursday, July 8

Pom Poms

Pom poms aren't the most expensive thing to buy, but if you find yourself needing one and you don't have any on hand, make one. They are super easy to make, you can make them any size you want, and it will only take you a few minutes to do. All you need are yarn, scissors and a pair of hands.

Start out by wrapping the yarn around your fingers. The more fingers you wrap it around the bigger your pom pom will be. You could also wrap it around a piece of cardboard or any other object that you could easily slip it off of. I wrapped it around about 35 times but if you want a fluffier pom pom then keep on wrapping.

Once you finish wrapping it, slide it off your hand, making sure to keep it in an oval shape.

Then take a second piece of yarn and tie it tightly around the center.

Then you will take your scissors and cut the loops on each side, this will give it it's fluffy appearance.

Once all your loops are cut, fluff your pom pom out and your done. If you are a bit of a perfectionist you can also give your pom pom a little hair cut to make it a bit more symmetrical before you use it on your projects.

Happy creating!

Thursday, July 1

4th of July Hats

Is your ensemble for Independence Day not quite complete yet? Maybe an Uncle Sam hat or Lady Liberty tiara is just the thing you are looking for.

To make the Uncle Sam hat you will need:
3 sheets of white paper
1 sheet of blue paper
tape
a paper plate
scissors
and a red crayon or marker.

Start out by cutting your blue paper in half length wise and then in half length wise again. You will only be using 2 of the strips unless you decide to make 2 hats. You will then tape 2 pieces together to make one long strip.

Next, take one of you sheets of white paper and cut out stars. Make sure they are no taller then your strip of blue paper because you will be gluing them onto it next.

Glue your stars on to your blue strip, add as many as you please. Then allow them to dry while you work on the next few steps.

Take your other 2 sheets of white paper and tape them together end to end, to create the longest sheet possible. You will then add evenly spaced lines to your paper, we did ours about 2 inches apart.

♥Miss Scarlett helping me out♥

Then color every other space in with your red crayon or marker.

Once you have that finished, size it to your Uncle Sam's head and tape it together to create a tube.

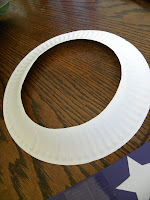
Using the top of your hat, trace the inside of it on the center of your plate. Then you will want to cut out the center, leaving you with the brim of your hat.

Now it is time to assemble. First tape your red and white striped paper onto your hats brim. Then you will add your blue strip to the outside at the base of your hat, tape it in place and your done!
For the Lady Liberty tiara all you will need are:
2 sheets of sea foam green paper
a black marker
tape
and scissors

Start out by taping your 2 sheets of paper together length wise. Then flip your paper over so that you can draw on it without the tape getting in your way.

Then you draw out your tiara pattern and cut it out. I don't have a pattern for this, I just drew a slightly curved line, then added some points to the top of it and black windows along the bottom, nothing special.

Then you just fold your points down so that they stick out when you are wearing your tiara. Now its ready to be sized. Find your model, size it around their head and tape the ends together. TA DA! Your finished and ready to celebrate.
I made one for each of us to wear on Sunday while we enjoy the day celebrating Independence Day with our family and friends.
Rating:♥♥♥
Cost:$

LinkWithin

Related Posts Plugin for WordPress, Blogger...