Tuesday, September 21

Grow your own monster

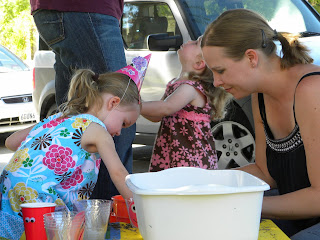
We recently had a Sesame Street party for Scarlett's birthday and the biggest hit of the day was the grow your own monster station. I think part of the reason it was so fun is that kids love to play with dirt but the older kids were also excited to watch it grow when they get home.
I decorated the front of clear, plastic drinking cups with Elmo and Cookie Monsters faces, which I laminated first so when they get watered they wont get destroyed. You can put the face of just about anyone on the front, just print it out on the computer and laminate it. You kids could even watch green grass grow out of their own head.
Then the kids filled the cups with potting soil and grass seed. Bonus: We did it on our lawn so that when seed spilled it would reseed some of our dry looking patches. 
Then you just take your little guy, give him some water, put him in a sunny area and watch the hairy thing grow. Caring for the plant and watching the growing process is such a great learning experience for kids too!

Wednesday, September 15

Zebra little bloom

New item in my Etsy shop! Little zebra print bloom with antique white button in the center.

Tuesday, September 7

SLIME!!!

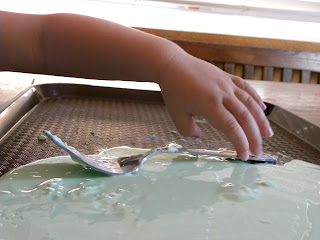
I love the feeling of slime running through my fingers and remember playing with this same concoction when I was a kid. This slime recipe is interesting to play with because it can behave like a liquid and a solid, depending on quickly your hands move with it. The faster you tug on in or squish it, the more solid it seems. All you need for this one is corn starch and water.
In a bowl combine 1 cup of corn starch with 1/2 cup of water. We added a few drops of green food coloring to our water before we mixed the two together so our slime was a little more slimy looking. 
Once the two are mixed together pour it out on your playing surface and let the fun begin. The slime is fun to squish around in your hands and to watch how it behaves when you let it drip through a fork or a slatted spoon.
Although it looks pretty messy, it is actually easy to clean up with a cloth and water when you are finished playing and you can just give your little ones (and your own) hands a rinse in the sink.

Now go get messy!

Rating:
♥♥♥
$

Friday, September 3

Sharpie Shirt

This is a fun way to get a tie-dyed look without all the mess. All you need are permanent markers, rubbing alcohol, a plain t-shirt, rubber bands, a cup, and an eye dropper.
This project can be kind of stinky so it is best if you can work outside or by an open window.

Start out by laying your shirt (or other material) and deciding where you want to put your design.

You then put your cup inside your shirt and place your rubber band around the outside, making sure to pull your fabric taught. I did 3 at a time but you can do them one at a time also.
You then create a design in the center of your cup area by making an outline with dots.
Once you have finished drawing on your dots, drop your alcohol around the inside of your design and watch it bleed outward. Depending on the size of your design you will drop about 20 drops of alcohol, making sure not to drop directly on your ink dots. Once your finish one spot, make sure to let it dry before you remove your cup and move onto the next spot, about 5 minutes.
Allow your shirt to fully dry, then you will heat set it with an iron or you can run it in your dryer for about 20 minutes. It is now ready to be washed and worn. I would wash it separately the first time to make sure the ink was set before adding it to your regular loads.
I only had a pink shirt for me so I only used a black marker so that it would show up well but I also did one for Scarlett on a white shirt and used multiple colors and it turned out beautiful.

It did a few different designs with rings of dots. You can experiment and see what you come up with, it's very fun.
That one make a pretty sun burst.
This one I made into more of a snowflake shape and added a little less of the alcohol to it to see what we would end up with.
And this one I did in the shape of a star with dots on the end.
The star now reminds me of a sea star.
Then I added "stems" to the bottom of all of them so that they became flowers. I'm obsessed now and want to try out more designs and color combos to see what takes shape.
My little model with her new shirt on.
And this is her way of telling me she is done with our little photo shoot now, bye bye.

Rating:

♥♥♥ Very sciencey and fun!
$

LinkWithin

Related Posts Plugin for WordPress, Blogger...