Tuesday, March 15

Seed Catcher

Harvey joined our family after I found him fighting for his life in a lake.  I have grown quite attached to this little guy and love having a bird as a pet. He sings us beautiful songs throughout the day and the kids and cats love to watch him. What I do not love about having a bird is the mess he creates around his cage from all the seed flinging that goes on in there.  That is no longer a problem thanks to the seed catcher I made for his cage, goodbye messy seeds!
This project cost me $0 since I already had everything on hand, yippee! If you have a messy bird and want to make one too, all you need is fabric, matching thread and elastic. I used about 2 yards of fabric but the amount you use depends on the size of your bird cage. 
The first thing I did was measure around the cage with my tape measure. It was about 70 inches around. Because I wanted it to fit snug and not slide down, I then cut my elastic about 3 inches shorter then the distance around the cage. I used 2 pieces of elastic to hold it in place, one on top and one on the bottom, so I cut 2 pieces of the elastic about 67 inches long. 
I used some bright farm fabric given to me from my grandma and cut one long piece. I wanted it to easily slip over the top of the cage and cover the bottom half, so I measured it to be about 6 inches longer then the distance around the cage. I then measured the distance from the bottom of the cage to the middle, then added 4 inches for seam allowance because I would be adding elastic. So I was left with a piece of material that was 76 inches long and 16 inches high.
I then folded the fabric over on top and bottom (the long ends) forming a fold that was about a fourth inch wider than the width of the elastic I used and sewed a straight stitch along the bottom of the fold. This will be the casing for your elastic.  
Then I slid my elastic through the casing, bunching it along the way and secured it at each end with a pin.
Once I had the elastic in, facing wrong sides together and making sure to catch both ends of the elastic, I sewed the ends together to create my finished piece.
I used the serger to finish the edges on the inside but it's not necessary.
Then I slid it over the top of the cage and into place. Now all the seed stays inside the cage and off the floor which means less vacuuming for me!


And whenever I need to change his food or water, I just slip the cover down to access them, very easy. Hope this comes in handy for someone else out there.

Monday, March 14

Boy Loves Dirt

Like father, like son.

Thursday, March 10

She got mail!

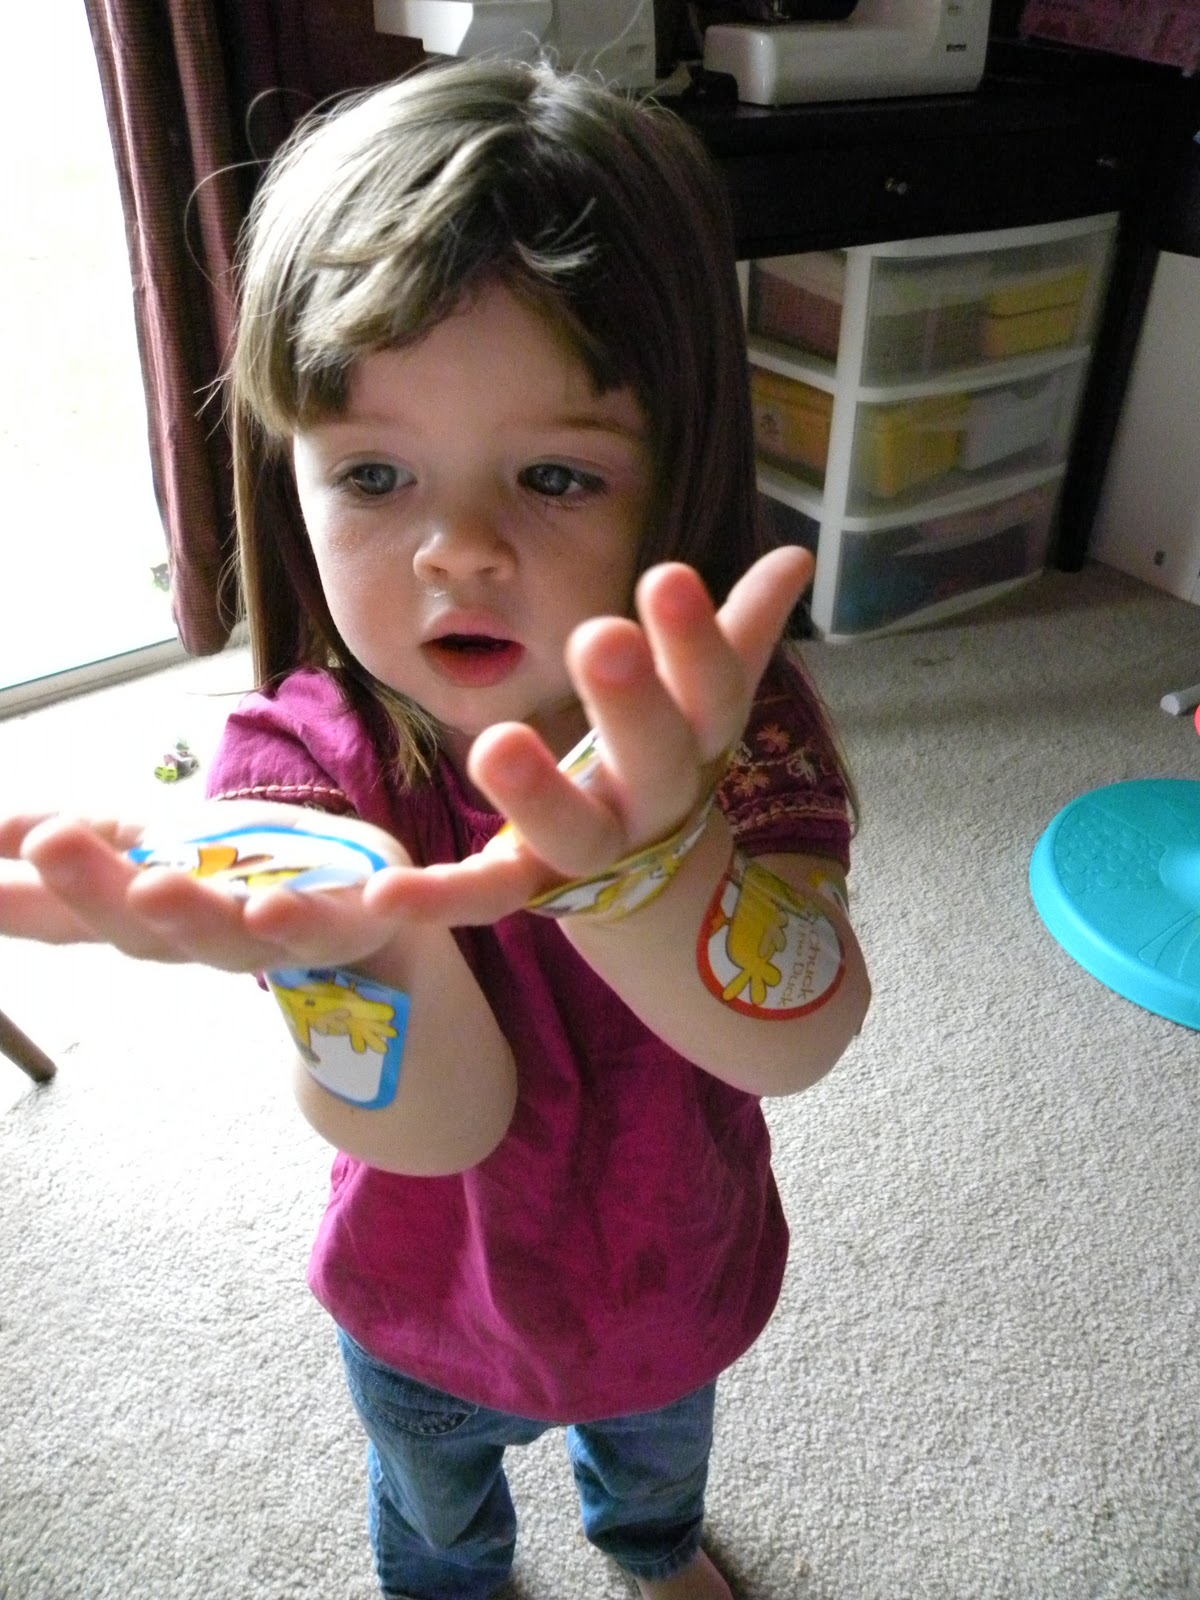
It's not often in this house that the kids get mail but yesterday Scarlett received an envelope. Inside was a sheet of stickers and some post cards; she was thrilled to open it when she got up from her nap.
The first thing she did was remove every sticker from the sheet and stuck them all over her arms and legs.
It's not like we don't have stickers at home but I guess getting them in the mail made them a treat. It was a fun little surprise to open up and who doesn't love finding something cool in the mail?

Wednesday, March 9

Making it Ours

I get hand me downs from a few of my friends and while the stuff is in really good shape, I love to make changes to things so that they feel like they are ours. I was recently given this nice little pink and white seersucker dress and although it was cute, it screamed Easter dress to me, not everyday use. I only made a few simple changes to it but now I love it and would put her in it any day.
I started out by removing the old tie that went around the waist and pulled off the bow and rosettes. I know, it's very wrinkly, I do not iron.
I had some Disney princess ribbon in my stash that I found at a garage sale that I had been dying to use on something and this was just the project to use it on. I also had a white crochet flower that my sister had made tucked away in my stuff that I pulled out and a pink button that matched perfectly. 
I sewed the ribbon across the waistline and left it long on each side so I could tie it in a bow in the back. Then I sewed the flower on, using the button as the center of the flower.
She calls it her princess dress and feels extra special in it, which makes me one happy momma!
Now she's ready for a day of planting strawberries...
or spying on the neighbors through the fence.
And it looks too dang cute with her John Deere boots, I love those boots, I wish I had a pair in my size.

Monday, March 7

From Onesie to T-shirt

Now that Scarlett is getting older I don't care for putting her in onesies, especially with potty training. Instead of getting rid of some perfectly good onesies, I turned them into t-shirts. 
It took about 30 minutes from start to finish to make the changes to three shirts, that's my kind of project.
I cut them off along the bottom, leaving them as long as possible.
I then used my serger (we have just recently become acquainted and I love her) to finish the edges. You could also just leave the edge raw and let it roll or hem it but that would take away a little of the length.
That's it! Just like that! Your finished!
Now I don't have to fuss with snaps when it's time to change a diaper or if a little someone is interested in using the potty and that makes momma happy.
And she is free to lounge around in the yard without a care in the world.

Friday, March 4

At the Hop

I made my first poodle skirt and had so much fun with this project. My friend needed a poodle skirt for her daughter for a school dance and asked if I could help, I was more then happy to try out a tutorial that I had seen online.
 I sketched out a poodle onto a piece of black felt with a white fabric pencil and cut it out with a pair of sharp scissors.
 I then used iron-on rhinestones, pink of course, to add a little bling to our puppy.
 I then drafted a pattern for the skirt using the circle skirt tutorial from Made, it was really easy to follow and was perfect for a poodle skirt. I used a light weight, pale pink, fleece for the skirt and 2 inch wide elastic for the waist band. The fleece was awesome because I didn't have to worry about hemming, time saver!
 Then, using fabric glue, I glued the poodle into place and added a little leash, made from a paw print ribbon.
I unfortunately didn't get any pictures of the cutie wearing the skirt but let me tell you, she looked cute. I can't wait to make one of these for my own little cutie one day, I love fun retro stuff!

Wednesday, March 2

Finger Painting

I was so excited when Scarlett discovered a set of finger paints while we were browsing at the Goodwill. We picked them up and I was dying to try them out with her later that night. Once Taylor went to sleep we got to painting.
  I rolled out a big piece of butcher paper and taped it to the kitchen table, put Scarlett in just her diaper and we dove in.
 She was a bit timid at first but quickly got comfortable with getting dirty and started smearing away.
 She was in a pretty crabby mood leading up to finger painting time and this was just the remedy to snap her out of it. We had such a great time creating masterpieces. Then she hopped in the bath, got cleaned up and was ready for a good nights sleep.
I love a good thrift store find!!

LinkWithin

Related Posts Plugin for WordPress, Blogger...